Showing posts with label Cinco De Mayo. Show all posts

Margarita Cookies

May 4, 2012


One last treat for Cinco de May week ... Margarita cookies! 

I can honestly tell you that I think these are the best cookies that I have ever had.  Ever.  And that says a lot coming from a die hard chocolate girl.  They are very light and fresh tasting and have a yummy lime flavor. 

I can take no credit whatsoever for this recipe, I found it on a fabulous blog called Bakingdom and did not change a thing about the recipe for the cookies. 

Here it is:

Margarita Cookies
Ingredients:
3 tablespoons fresh squeezed lime juice
1/4 cup milk
1/2 cup (1 stick) butter softened
3/4 cup sugar
1 egg
1 tablespoon tequila
2 teaspoons finely grated lime zest
1 3/4 cups all-purpose flour
1 teaspoon baking powder
1/4 teaspoon baking soda
Pinch of salt

Lime Frosting* - (This I did alter slightly from the original recipe)

1 cup (2 stick) butter, softened
3 to 4 cups confectioners’ sugar
1 teaspoon vanilla
1/4 cup lime juice
1 tablespoon tequila
3 teaspoon finely grated lime zest

*This makes enough frosting to frost 2 batches of cookies.  I have never tried cutting the recipe in half, so I wasn't sure how it would turn out and didn't want to post the recipe if I hadn't tried it.  My answer to this problem ... Make 2 batches of cookies ... I promise, they won't last long!

Directions:

Preheat the oven to 350 degrees. Line 2 baking sheets with parchment paper or spray with cooking spray.

In a small bowl, combine the flour, baking powder, baking soda, and salt; set aside.

In a large bowl, cream the butter and sugar together until fluffy. Beat in the egg, then add the lime juice, zest,  milk, and tequila. Mix well. Mix half of the flour mixture in with the wet ingredients; stir until combined. Add the remaining dry ingredients and mix again.

Drop tablespoonfuls of batter onto baking sheets, leaving room for the cookies to spread. Bake for 12 to 15 minutes, or until cookies start looking firm on the outside. Allow to cool on the sheets for 2 minutes, then transfer to wire cooling racks. Cool completely before frosting.

To make the frosting: Cream butter until light and fluffy.  Add the 3 cups sugar and beat until the mixture comes together. Mix in the vanilla, lime, and tequila and beat until fluffy. Add more lime juice or more powdered sugar if the consistency needs adjusting.  Add the zest and stir well.

We really hope that you have enjoyed Cinco de Mayo week on Try One.  We have had a lot of fun with it and will probably be doubling up on our challenge exercises to make up for all the calories we have consumed this week. 

Or maybe we will just buy bigger pants!

Hallie

Margarita Chicken Fajitas

May 3, 2012


At a Mexican restaurant, Chicken Fajitas are my go to dish.  Any time we have ever tried a new Mexican place, this is always what I will order the first time we visit.  If a place makes a good fajita, it's a keeper.  Unfortunately, not many places do.  A lot of times, the chicken is bland.  Like they took it out of the freezer and just threw it in a pan bland.  No marinade or seasoning whatsoever.  Those places don't get a second try.

So, while I was guzzling politely sipping margaritas the other night, I thought, hmm, I wonder if this would make a good marinade?  So, tonight, we tried it.  Because, to be honest, in my old age, I cannot finish 4 margaritas on my own.  (Hubs was not partaking) So we had some leftover anyhow ... let's put it to use.

First, one thing to know.  This is not one of those marinades that you want to sit for hours and hours and hours.  It has lime juice in it.  The citric acid will eventually cook your chicken and give you mush.  You want to marinate for somewhere between 45and 90 minutes.  If you are looking for a sweeter chicken, go 90.  If you are just looking for some tang, go 45.

Here is what you'll need:

Ingredients:

1lb chicken, cut into fajita size slices
Margarita marinade found
Green, red, and yellow peppers
Onion
salt, pepper, chili powder, garlic salt - to taste
Tortillas
Any assorted toppings you enjoy:  tomatoes, cheese, lettuce.

Cut up chicken and place in dish.  Cover with marinade.  Cover dish and refrigerate 45 to 90 minutes.

Cut up peppers.


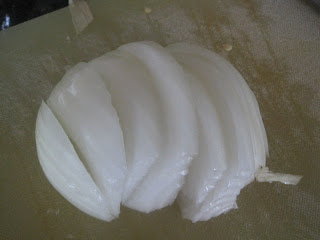
Cut up onion.


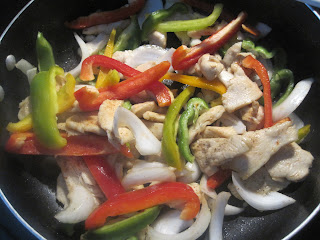
Once chicken has finished marinating, throw in hot pan and saute till almost done.  Add peppers and onion. 


At this point, I also threw in a little salt, pepper, garlic salt, and chili powder.  Saute until veggies are crisp tender.

Serve with your favorite toppings. 


We really enjoyed this!  The chicken was very flavorful and went well with the variety of peppers.  Definitely a keeper of a recipe!


Buffalo Chicken Enchiladas

My husband and I were married on April 29th and were in Mexico for our honeymoon on Cinco de Mayo. I'd love to say that we went out and partied it up spring break style. But I'd be lying. We spent the day on the beach, did some shopping in the local markets, had dinner at the hotel and then watched some weird 80's theme hotel variety show from our balcony. We tend to make snarky comments, and felt it was probably wise to judge others from the safety of our room. What we did not do that day was encounter anything buffalo spiced or sauced. It may not be authentic Mexican food...but it's an enchilada, so it counts. Right ? You should make these for Cinco de Mayo, or for a get together or because it's a Wednesday and your husband wants something spicy. Good stuff.

Pretty much every night my husband watches tv and I visit my favorite blogs and spend way too much time on Pinterest. If I find something I think he'll like, I share and get varying responses. Usually it's a head nod, but this recipe for Buffalo Chicken Enchiladas got a "yes, please."

Very simple ingredients. Poached chicken, enchilada sauce, hot sauce (Frank's obviously), tortillas, green onions, mozzarella cheese, and blue cheese crumbles.


I prepped the ingredients in the morning before the girls got up. I started with 2 large chicken breasts in a sauce pan and covered them with chicken broth and brought to a boil, reduced heat and simmered partially covered for 10 minutes and then removed from heat and covered for 15 minutes. After it cooled I shredded it. I chopped the green onions and also combined my enchilada sauce and Frank's. The recipe called for a 14 ounce can of enchilada sauce, but I had a 19 ounce can. I used the 1/3 cup of Frank's so my ratio was a little lighter on the hot sauce than the recipe called for, but it was still sufficiently spicy. Before I placed the chicken in the refrigerator I added 2/3 cup of the sauce mix to the chicken so it could absorb the flavors.

30 minutes before dinner I preheated to 350 and placed some sauce on the bottom of a 9x13 baking dish. The recipe calls for an 8x8 dish, but I used small tortillas instead of the large which were called for, so I ended up with 7 smaller enchiladas that took up more space. Plus I had more chicken and sauce. I added half of my green onions and a about 2/3 cup mozzarella to the sauced chicken and then started filling and rolling the tortillas. After I placed them seam side down I covered with the remaining sauce and cheese. The recipe said to add the Gorgonzola after the enchiladas were out of the oven, but I wanted it more melted as part of the dish instead of as a garnish.


It baked for 25 minutes (I added a bit more time because the chicken had been refrigerated). It was bubbly and smelled deeeelicious!


He loved them and The Princess said she didn't want to try "endurladas". No big surprise there :)

For the full recipe visit The Novice Chef Here

Bryn

Weeknight Churros

May 2, 2012


I saw this recipe on the Pillsbury website and I knew I had to try it.  Why?  Because it's food on a stick. And who doesn't love food on a stick?  I told Bryn we really need to do a whole week of food on a stick.  She was in ... look for that in the coming months.

Back to churros.  The other reason I wanted to try this is because as much as churros always sound good, usually, they aren't so good.  To be honest, I don't know if I have ever had a churro that I loved.  Yet, I still always get suckered into buying one in the hopes that they will live up to my expectations.  Usually, it is just another $1 down the drain. 

These were different though.  They aren't a true churro, really.  It's crescent rolls covered in butter and cinnamon sugar.  But they were crazy easy and really good.  The kids really enjoyed them.  #2 had a little bit of trouble eating them as you kind of have to eat them corn on the cob style.  But once she figured it out, she was all in! 

So grab a can of crescent rolls and some sucker sticks (you can get these at Michaels or even walmart in the cake decorating section).  Preheat your oven to 350 degrees.  Layout the crescent rolls flat.  Pick up one and starting at the top of the stick, wrap the crescent roll around the stick - making sure you twist the dough as you go around the stick.  They should come out looking like this:


I highly recommend covering your pan in foil.  Butter and cinnamon sugar tend to make a hot mess on pans.  Just a suggestion.

Next melt some butter in the microwave and then brush all sides of the churro with the butter. 

Now, sprinkle churros with cinnamon sugar.  I recommend heavy on the sprinkling. 


Bake for about 4 minutes, then turn over and back for 4 to 5 more.  They should come out looking something like this:


I also highly recommend doctoring these up with a little bit of chocolate sauce, like so ...


Yum!  Super easy, can even be made on a school night!

Hallie

Homemade Churros


My husband's family is Italian and he grew up eating fried dough. Bread dough fried and then sprinkled with powdered sugar or cinnamon sugar or served plain to eat with a meal. I'm from the Midwest and grew up eating portions of canned biscuits dropped into oil and then rolled in cinnamon sugar. We only had them on fondue night though. Who wants to waste a large vat of oil? The Princess loves both of our versions. However, after eating these churros, I think she's found her favorite.

I will be honest. I had to make the churros twice. The first time I made them I made the dough the day before and refrigerated. I set the dough out to come to room temperature while the oil was heating, but the oil reached 350 degrees and the dough wasn't ready, but I went ahead and started making them anyway.

BIG mistake.

The dough was so thick that when I tried to pipe through the star tip, it pushed the tip through my bag and created a large hole. I figured the only problem would be that they ended up thicker, but still good.

Wrong-O.

They were so thick that the outside got crispy and brown and the inside was completely raw dough. Gooey sticky raw. My husband ate some and said they were tasty. I was gagging, but since there were no eggs in the dough, I didn't stop him. Gross doesn't always equal food poisoning...I have to pick my battles. Of course I couldn't let it go. I had to start all over and fix my mistakes.

Thankfully, the recipe is very simple and starts with an easy cooked dough.


Dough
1 cup water
2 1/2 Tbsp white sugar
2 Tbsp vegetable oil
1/2 tsp salt
1 cup flour

Topping1/2 cup sugar mixed with 1 tsp cinnamon

Combine water, sugar, salt, and oil in saucepan and bring to a boil. Once boiling, remove from heat and add the flour. Stir until mixture forms a ball.


Add dough to a piping bag or large ziplock bag fit with a star tip (I used Wilton 1M). Pipe dough into oil several strips at a time. Mine were about 3-4 inches long.


Fry until golden brown. I fried mine for about a minute and then turned them over and fried another minute. Once done, drain on paper towels and then roll in sugar mix.

The Princess called them crunchy sweet fries. I would describe them as a mix between a Taco Bell cinnamon stick thing and hot fried dough.


Nothing bad about that.  Definitely try these!

For full recipe go here

* If you don't have a star tip, these will still be fine. You could use a round tip or just cut a hole in the corner of a ziplock bag. These were roughly the diameter of a sharpie. I wouldn't go any larger than that.

* While piping the second batch into the oil I noticed another difference from the first batch. The second batch floated...the first batch sank. It was pretty clear that I should have sat the dough out much earlier to warm to room temperature. However, in the future I won't mess with making it the day before. The dough is so simple to make, it really doesn't save much time.

Bryn

Fried Ice Cream

May 1, 2012


When I was little we lived near Tulsa, OK. We would meet our cousins at the mall and then go out for lunch at Casa Bonita, the best Mexican restaurant EVER! I mean, I was young, so it was probably teeming with disease and dirty silverware, but you could eat inside a cave!!! Seriously, a cave. And there was a waterfall and a puppet show, and they served sopapillas with honey at every meal. Bliss. Every now and then one of us would order fried ice cream and share. It was the best combination of texture and temperature. Crunchy and warm on the outside and cold and creamy on the inside. When Hallie and I decided to do a week of posts for Cinco de Mayo, I knew I had to try to recreate it.

I found various recipes but settled on one from "Simply So Good". The recipe calls for ice cream, cereal, coconut, cinnamon, milk, eggs, and oil. All things I already had in my house, so we were ready to roll. I found recipes that called for frosted flakes or just the plain corn flakes and then added sugar. Also some recipes substituted nuts or ground cookies for the coconut. This is a recipe where you can adjust to your tastes. Always nice. I scaled down the ingredients for our family.


My ingredients
4 1/2 cup scoops of ice cream (I used vanilla)
3 cups frosted flakes
1 cup shredded coconut
1/2 tbsp cinnamon
2 eggs
1 tbsp milk
Oil for frying

First, line a pan or plate with wax paper and have it ready to load with the ice cream balls. Scoop out about a half a cup servings and place onto pan. I made sure they were roughly in the shape of a ball, but didn't get too over excited about it. I would be rolling them in cereal later and knew I could correct the shape at that point. These melt fast, so work quickly and then place in freezer to harden.


While you're waiting, crush your cereal and add your coconut and cinnamon and place on a plate. Beat your eggs and milk.

The recipe says to leave the balls in the freezer for an hour, but mine were in for over four hours, and were fine. I didn't think The Princess would be able to help with this stage so I waited until nap time. I let them sit for a minute to allow the cereal mixture to adhere to them better. Roll the balls in the cereal mixture to coat, then into the egg mix and then again into the cereal. At this point you can improve the shape. Once coated and shaped, place them back onto pan and return to freezer. As you can see, I coated the bottom of my pan with the cereal mixture just to make sure the bottom of the balls didn't lose their coating while in the pan. Freeze for several hours or until very firm if making same day. I froze mine overnight.


When you are ready to prepare make sure to have your serving dishes, spoons, and topping ready. These cook very quickly. Heat your oil in a pot to 365 degrees (I used a small saucepan and cooked one at a time so that I didn't have to use so much oil). They will fry for only 20-30 seconds. I didn't sit mine on paper towels to drain because I was nervous they would stick, but I worked with a slotted spoon and then held them over the paper towel before placing bowl. The outside was crunchy and the inside was still pretty solid and cold. We didn't top ours with anything , but you could add honey, caramel or chocolate sauce. At Casa Bonita they were drizzled with honey. They also came with a mariachi band...so it was hard to compete, but these were very very good.


For full recipe, check out Simply So Good here

Bryn

Happy Cinco de Mayo Week!

Apr 30, 2012


And what better way to start celebrating Cinco De Mayo Week than with a margarita!  But not just any margarita ... one you make from scratch, using no bottle mix.  Have you ever read the ingredient list on the bottle of margarita mix, um, yuck.  And this recipe is soo easy, you'll never go back!

When I was thinking about writing this post, I was trying to remember when my love affair with the margarita started.  But I couldn't remember.  Possibly too many margaritas?  Maybe I am just getting old.  I do remember my first margarita though.

It was in college.  And it wasn't so much a margarita as it was, um, a college experience.

The details are a bit fuzzy, but my roommate and I were wandering the dorm halls, I think it was the week before classes started.   We stopped into a room party.  In this room party, they were doing upside down margaritas. 

I was a good girl. 

A good girl who had no idea what the hell an upside down margarita was. 

But I was totally in. 

It was the first week of college after all.  We were ready for fun.  And the only advice my roommate's dad had given her on college drinking was "Don't drink anything that comes out of a garbage can".  (As a side note, I would add to that, Don't drink anything that comes out of a bath tub either).  And there were no trash cans in sight. 

So, I sit in a chair, tilt my head up side down and someone basically pours tequila and margarita mix in my mouth and tells me to shake my head.  Alright then.  Was it good?  Uh, probably not.  Truth is, I don't remember.

But somewhere between then and now, I have learned to love this drink in it's rightside up variety.  It reminds me of Jimmy Buffett, sandy beaches, and vacation.  Three things I love and can't get enough of. 

Try this recipe, you won't be disappointed!

Homemade Margaritas, on the rocks

Recipe:

Simple Syrup:
1/2 cup sugar
1 cup water

Other ingredients:
1 cup fresh squeezed lime juice (this is a lot of limes ... like 10 or so)
1/2 to 3/4 cup Silver Tequila (depending on how much of a punch you are looking for)
1/2 cup cointreau (yes, it's expensive, yes, it's worth it)
Directions:

Heat water and sugar in saucepan over medium heat until sugar is dissolved.  Water should be clear.  Pour into pitcher and let cool.

While cooling, start squeezing your limes.  This might take awhile.  And take a tremendous amount of hand strength.


Once the simple syrup is cool,  add lime juice, tequila, and cointreau to pitcher and chill.  Once cold, serve over ice and enjoy!  This makes about 4 margaritas. 


Hallie


Blog contents © Try One ... 2012. Blogger Theme by Nymphont.