Showing posts with label recipes. Show all posts

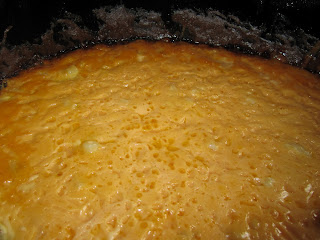
Chewy Peanut Candies

Oct 26, 2012


Have you ever had a week when the thought of planning a meal days ahead of time, then going to the store, and then getting ingredients prepped and ready for the slow cooker seems way too overwhelming? 
 
I mean, the slow cooker does the cooking for you, and yet I still couldn't wrap my head around making it happen.
 

But candy? 
 
I had no problem getting this made. 
 
First of all, the recipe is so easy no real brain power was needed. 
 
Secondly, my husband was more than happy to go to the store for some peanuts when he heard that they would be turned into peanutty goodness that taste similar to a Payday.

When I came across this recipe several months ago I thought they would be a great addition for my Christmas treat boxes that I take to neighbors, teachers, etc. I make peanut clusters every year and didn't want to make both the clusters and these, so I needed to decide which treat was better. I decided to make the chewy candies and top them with chocolate for the taste comparison. Now seems like as good a time as any to test them out...
 
Ingredients
4 Tbsp butter
3 cups of sugar
1 cup of corn syrup
2 tsp vanilla
2 tsp baking soda
4 cups peanuts
 
Chocolate chips
Shortening
 
*I used a 6qt crock pot which seemed to work really well for this recipe. When you add the nuts in at the end the candy expands quite a bit.
 
*Have 2 cookie sheets lined with parchment paper before you finish the candy in the crock pot. The candy goes directly onto prepared pans after the addition of the nuts, but you need to be ready.
 
Place butter in crock pot. Add sugar, corn syrup and vanilla on top of the butter Cover and cook on high for one hour. 
After this first hour of cooking stir everything around to combine. Stir in the baking soda. Cover and cook on high for another 30 minutes. Stir and then cover and cook for another 15 - 30 minutes until the mixture becomes a caramel color. 
 
The original post tells you to look for the color of peanut brittle or a Payday candy bar. (Mine reached the desired color after about 10 minutes.) When this color is reached stir in your nuts. The mixture will foam and swell while you add them. Using oven mitts pour mixture onto the two prepared cookie sheets and spread out using a spatula. 


Allow candy to cool for an hour then tear into pieces.
At this point I was impressed with the taste of the candy, but not so much with the presentation. Next time I might cut it instead of tearing it because it pulls and stretches and the edges look a little junky. I ended up rolling them up a bit to conceal the edges. 
To coat the candies I melted chocolate chips with a bit of shortening for easy dipping and allowed to harden. 
These turned out really well. They tasted like a Payday until I added the chocolate and then they took on a Snickers taste...both versions got tons of compliments. 
As for the Christmas treat boxes...These Chewy Peanut Candies really are all together different from the peanut cluster...so I think I'll be making both.
Bryn

That Mom

Oct 16, 2012

In my wildest dreams, I never thought I would become That Mom.

And for the most part, I'm not. 

For instance, I am lucky to get a shower by noon on most days.  Especially if it is a run day.  Why on earth would I shower in the morning knowing I am just going to get all sweaty and have to do it again a few hours later.  I have no desire to look pretty at the bus stop.

Also, let's talk about what I wear on a daily basis.  Um, mostly workout clothes.  Partially because they are comfortable, partially because I have very few clothes that fit.  You would be proud of me dear readers ... I finally braved the mall and it's teenage clerks and bought myself a pair of jeans that fit.  I hate shopping and having a 16 year old kid try to sell me skinny jeans is anxiety provoking for me.  So, can I get by all winter with just one pair?!?

Hairstyle, mostly ponytails.  Yes, I am 36 years old and my hairstyle of choice most days is a ponytail.  It takes too much effort and time to dry my hair.  And most days, the only people I see are my 3 year old and the clerk at Target.  Don't think either of them care. 

So I am certainly not the perfect looking mom that is bright eyed at the bus stop with her starbucks, but where I do get "that mom" status is my baked goods.

I'm the one that brings home made baked goods everywhere she goes. PTA meetings, bus stops, ballet class recitals, soccer games.

And considering the amount of catasphrophes that I have had in the kitchen, it is fairly amazing;

My fire count is at 3, I think

I've cut myself severely more than a few times with knives, scissors, a mandolin, and a blender

Once, I picked up a pan that had just come out of a 350 degree oven with my bare hands

I've burnt the heck out of a whole lot of recipes

I once mixed up the measurements for salt and sugar ...

I could go on and on

Despite all the catastrophes, I just love to bake.  It's fun.  And stress relieving.  

Here's my secret ... the reason that I bring this stuff everywhere I go ... Really is all about me ... I love love love to bake and play in the kitchen, but if it sits around the house, well, I will eat it and eat it and eat it ....

Seriously, until I am physically ill.  I have a sweet tooth like no other and absolutely no self control.  And I really don't want to have to go back to the mall and buy another pair of jeans.

Those Granola Bars I make ... I may or may not have finished off the entire batch once in 4 days. 

Just add it to the list of self help programs I need. 

And since I started running, while I could induldge more in sweets, I actually don't.  Seems counterintuitive I know, but my logic is that if I just ran my ass off for 50 minutes, I really don't want to ruin it 20 minutes later by eating a whole pan of granola bars.  Make sense?

So I bake, you enjoy, there is nothing to hate about that, right?

I saw these on pinterest and knew I had to try them.  They are so cute!  What a great idea!


They are sugar cookies ... shaped to look like candy corn.

Fun, right?

I used these for bus stop treats.  Packaged them up in little cellophane bags with cute little ribbons.

These were really easy to put together, I thought that they might be hard. 

Basically it is a sugar cookie with colored dough. 

***Just a warning before you get started, you really want to refrigerate this dough overnight!!!*****

Here's the recipe:

2 Sticks Butter, softened
1 c. Sugar
1 Egg
2 T. Lemon Juice
1/8 t. Salt
3 c. Flour
1/2 t. Baking Soda
Red Food Coloring
Yellow Food Coloring
Sugar for Coating

Preheat oven to 375 degrees.

Combine butter and sugar in a large bowl; beat at medium speed until creamy. Add egg, lemon juice, and salt. Continue beating until well mixed. Add flour and baking soda, beat until well mixed. Divide dough into thirds.

Press one-third of the plain dough evenly into the bottom of a loaf pan that you have lined with parchment paper. Place another one-third of the dough into a bowl and add yellow and red food dye to make orange.  Once it is mixed evenly, press orange dough evenly over white dough. In another bowl, add the final amount of dough and dye yellow. Press that evenly over the orange dough. Cover and refrigerate overnight. 


Once chilled, turn your loaf pan upside down on a cutting board and unwrap your dough. Cut loaf into 1/4-inch slices.  


Cut each slice into 6 wedges.  Roll each wedge in sugar then place on pan.


Bake 6 to 10 minutes, until just a tiny bit brown on the bottom.  You don't want to over bake these!


The kids loved them, they were delicious, and this made a ton (though the cookies themselves are small).

Happy Fall everybody!

Hopefully I'll be back later in the week with a scone recipe and a story of how NOT to use a mandolin!

Hallie

Baked Apple Chips

Oct 15, 2012


There are tons of easy homemade snack recipes out there. The problem is that many of them take forever, aren't terribly nutritious, or the kids in your life won't eat them. Have you ever peeled a can of garbanzo beans and roasted them only to have your child turn up their nose and not try A Single One? Ever make a kid cry insisting she at least try a kale chip? Ever spent over an hour cutting out shapes from dough made of cheese in order for the final product to be chewed and spit out?

Just me...

Well, this snack is easy, very nutritious, and if your child won't eat them she may be an alien.

Just saying.

These baked apple chips are fantastic. My one year old ate a full apple today and my 4 year old chose them for "dessert."

Ingredients

Golden Delicious apples *
Sugar
Cinnamon

Preheat oven to 225 degrees and line baking sheets with parchment paper.
Slice apples on mandolin. If you can get apples sliced super thin with a knife, go for it, but I know my limitations. I don't have an apple corer so I don't core my apples. If the inner core is hard I will cut it out of individual slices with a paring knife, but you'll find that it is unnecessary. Place apple slices on prepared baking sheets being careful not to overlap apples. Sprinkle with cinnamon sugar.  Bake for 1 hour. Turn apples over and bake for another hour. After second hour of baking turn the oven off and let apples cool in the oven. This is where they become crisp, so don't get discouraged before they have sat in the oven and cooled completely.


* I use Golden Delicious apples because they have enough sweetness but are a tad tart and have a great texture. Because the flavors really concentrate Granny Smiths become too sour for my taste. A sweeter apple would also be great.

Bryn

Sweet Potato Biscuits

Aug 22, 2012


Since school started, it seems my Internet searches can be boiled down to two things ... school lunches and after school snacks.  I have been looking for different things, I get so sick of packing the same old stuff every week, I am sure #1 gets sick of it too!  I found this recipe for sweet potato biscuits on the Weelicious site and it looked interesting.  Plus, I had never made homemade biscuits before (and these were going to be packed with vitamin A), so I decided to give it a shot. 

Sweet Potato Biscuits

2 cup all purpose flour
2 teaspoons baking powder
1/2 teaspoon baking soda
1 teaspoon salt
1/4 cup butter, chilled and cubed
1 cup sweet potatoes, cooked & mashed (I used the microwave)
1/3 cup milk
2 tablespoons honey

Preheat oven to 400 degrees.

Combine Flour, Baking Powder and Soda and Salt in a food processor.  Pulse a few times to combine.  Now add butter and continue to pulse until butter is evenly distributed and mixture is crumbly.

Add the rest of the ingredients and pulse till fully combined.  Should look roughly like this:


Dump out your dough onto parchment paper.  My dough was extremely sticky.  I added a bit more flour to make it more tacky than sticky.


Knead a few times, just to make sure everything is combined then shape into a circle.  Every recipe for biscuits I looked at said be sure not to over knead ... so don't over knead!!  Place another sheet of parchment on top and roll out dough.  You want this about 1/2" thick. 


The girls were helping with this snack, so they chose to make heart shaped biscuits.


Place cut out biscuits on a parchment lined backing sheet - spray parchment lightly with cooking spray to prevent sticking.


Bake for aprox. 15 minutes. 

Don't these look yummy?


We gobbled them all up!  I got 18 small biscuits and they were gone in about 2 days!

Enjoy!

Hallie

Peach Fruit Roll Ups

Aug 21, 2012


I was really excited to find a recipe for "homemade fruit leather" that used the oven and not a food dehydrator.

I have an oven.

Not so much on the food dehydrator.

These would be a perfect after school snack. They taste so much like a store bought fruit roll-ups. Really. You know how all the different flavors of fruit roll-ups taste pretty much the same? That's what these taste like. If you didn't know they were made from peaches you would just say they were fruity and delicious.

Peach Fruit Leather
-recipe from Weelicious

4 ripe skin on peaches
1 tbsp honey

Preheat oven to 225. Line a baking sheet with parchment paper.

Purée peaches and honey in blender or food processor.


Pour onto prepared pan and smooth with a spatula into a rectangle. I used a 15x12 pan and smoothed out with an offset spatula into the 15x11 rectangle the recipe recommends.


Place in oven and cook for 3-4 hours. The finished fruit leathers are dry to the touch and no longer sticky. Store bought fruit leathers are tacky, not sticky...these should be too.


Make sure you keep a close eye on these while cooking the last hour or two. Every oven is different and because all peaches will be at different moisture levels, there isn't really any indication of how runny the purée should be.

Some of the edges on mine dried out and hardened to a crisp. Despite trying really hard to make sure I had spread the purée evenly, obviously it wasn't completely consistent.

Remove from the pan and let cool on the parchment paper. I found it was easiest to use my kitchen shears to cut into desired portions.

Bryn

Slow Cooker Lasagna

Aug 15, 2012


America's Test Kitchen's Slow Cooker Revolution

I like to make large casseroles and soups and then keep portion out and store individually frozen meals for quick dinners or easy lunches for my husband to take to work. In the winter, this is no problem.

When it's 103 degrees out, turning on the oven and browning meat and simmering a sauce on the stove kind of lose their appeal. Most slow cooker recipes for casseroles or soups start with browning meat or sautéing vegetables on the stove, so I was excited to find this recipe, from "America's Test Kitchen's Slow Cooker Revolution" that didn't require any prior cooking of ingredients other than the noodles.

This lasagna turned out great. I didn't expect the cheese to brown like it would in the oven, but it did and the lasagna held its shape after being removed and was easily cut and served. My husband loved it, "The Princess" wouldn't touch it, and "The Little Lady" ate more than a 9 month old really should. So, pretty much the usual.


Sausage Lasagna


Vegetable Oil spray
8 curly edged lasagna noodles (7 oz) broken in half
Salt and pepper
1 3/4 cup ricotta (15 oz)
1 1/4 cup shredded Parmesan cheese (2.5 oz) (I used the canister kind)
1/2 cup minced fresh basil
1 large egg
1 jar tomato sauce (recipe recommends 24 oz Bertolli tomato and basil sauce)
1 lb Italian sausage removed from its casing (I used Italian turkey sausage)
4 cups shredded mozzarella cheese

Make a sling and collar for crock-pot*. Spray with cooking spray.
Add 1 tbsp salt to 4 quarts water. Boil noodles to al dente according to pasta box instructions. Drain and rinse with cold water. Lay out in single layer to dry on a clean kitchen towel. (pasta will stick to paper towels).

In a bowl mix ricotta, 1 cup Parmesan cheese, egg, 1/2 tsp pepper, 1/2 tsp salt, basil.

Spread 1/2 cup of jarred tomato sauce on bottom of foil lined slow cooker. Arrange 4 noodles on top of sauce, they may overlap. Place 9 rounded tablespoons of ricotta mixture on noodles (the recipe didn't say to, but I smoothed out the ricotta mixture bc I like things to be uniform). Drop 1/3 of the sausage onto the ricotta layer. Next, sprinkle 1 cup mozzarella and then spoon 1/2 cup tomato sauce over the cheese. Repeat layers of noodles, ricotta, sausage, cheese, and sauce twice more.

For the last layer arrange 4 noodles, then top with remaining sauce and sprinkle the last of the mozzarella and Parmesan.


Cover and cook until lasagna is cooked through, 4 hours on low. (I cooked the first hour on high because I was just too nervous that the turkey meat wouldn't be cooked all the way through on low).


Let cool for 20 minutes then transfer using sling to serving dish.


Recipe slightly adapted from America's Test Kitchen's Slow Cooker Revolution

*For directions to make a collar and sling, scroll to bottom of cake recipe.
http://www.365daysofcrockpot.com/2011/05/happy-birthday-crockpot-cake.html

 Bryn

Crock Pot French Dip Sandwhiches

Aug 14, 2012

So, you are going to have to use your imagination for this post.

Why?

Well, because I forgot to take pictures. 

Totally and completely forgot.

Planned the meal, specifically for this post because it is crazy easy and it makes your house smell delicious in the process.

And then life got busy that day and I forgot.

Yeah .. um ...

Ok, so life didn't only get busy ... it also got, uh, messy.

You see we are potty training our 2 year old.

You can see how that could be messy, right?

Between the refusing to poop in the potty and the 100 trips running to the potty when she never actually went, well, that day was sort of a bust.
But I was so glad to have this meal already in the crock pot!!  It was a life saver, because there was no way I was going to be able to cook anything that night.  And that is what this week of quick and easy meals is all about! 

So, just use your imagination for me, please?  I promise you will love this meal!

Ingredients

3-4 lb Roast
1 Package Au Jus Mix (usually found in the spice aisle, with the chili packets, etc)
1 Package Italian Dressing Mix (Found in salad dressing aisle - the dry seasoning package)
1 Can beef Broth

Mix the last three ingredients in your crock pot until all lumps are gone.  Add roast.  Cook on low for 10 to 12 hours.  Usually after about 7 or 8 hours, I pull the roast apart and then put it back in to soak up so more juice.

To serve, we make sandwiches on hoagies with lettuce, onion and tomatoes.  The kids just eat the meat, no sandwich, cuz that's how they roll.  I usually cook up some steak fries or serve with chips.  The best part is there are left overs, so this can be two nights worth of meals!!

Hallie

P.S.
You'll be happy to know that potty training is going much better! We are 100% accident free, we even conquered the poop!!

Slow Cooker Mac and Cheese

Aug 13, 2012

I do not have good luck with baked macaroni and cheese.

The cheese separates and looks curdled.

I don't know why this happens...all I know is that it's gross looking.

Tastes fine, but looks awful. There are a ton of recipes that call for canned cheese soup or Velveeta cheese to prevent this from happening, but that just seems like cheating to me.

I have read and heard many things about crock pot Mac and cheese and decided to give it a shot, because really, it couldn't be any worse. The thing about crock pot cooking is that once you've added your ingredients, you let the equipment do the work for you.

This is good in two ways. For one, it's easy. For two, it's hard to blame yourself if the meal fails when you've followed the recipe.

I had a hard time deciding which recipe to try because if there were reviews they were usually about 50% success and 50% curdled failure. So I decided to try one with no reviews to lesson my anxiety that it was destined to turn out horrible.

So, this recipe did have a bit of the curdling, but not as bad as others. Before I added the cheese to the top, the cheese in the sauce had started to separate, but I was able to stir the sauce and smooth it out.

It could be the quality of the cheese i used?

Next time I'll use a better cheese or I'll just cheat and use processed cheese!

I think I earned a participation medal for this one.

Ingredients

 1 8 oz. box elbow macaroni
1 cup medium cheddar cheese
1 egg beaten
2 cups sharp cheddar cheese
1 large can evaporated milk
1 teaspoon salt
1 teaspoon pepper
2 tablespoons butter (softened)

Prepare macaroni as instructed on box, then drain. I cooked mine 1-2 minutes less than instructed to allow for the remaining cooking time.


Spray crock pot with cooking spray. Add all ingredients to crock pot except for the 1 cup of medium cheddar cheese.


Once combined top with remaining cheese. Cover and cook on low for 3 hours and 15 minutes.


Bryn

Muffins Muffins Muffins

Aug 10, 2012


Who doesn't love a muffin? 

Especially one chocked full of veggies that your kids will willingly eat!

This recipe came from allrecipes.com, but with a decent amount of changes. 

1 1/2 cups all-purpose flour
3/4 cup whole wheat flour
3/4 cup oats (I use old fashioned)
1 teaspoon salt
1 teaspoon baking soda
1 teaspoon baking powder
2 1/2 teaspoons cinnamon
1/4 teaspoon nutmeg
3 eggs
1/4 cup vegetable oil
1/2 cup unsweetened applesauce
1 cup plain or vanilla flavored yogurt
1/2 cup white sugar
1/3 cup honey
2 teaspoons vanilla extract
1 cup shredded zucchini (drained)
1 cup shredded carrots

Preheat oven to 400 degrees.

In a medium size bowl, sift together the first 8 ingredients. In a separate, large, bowl, beat together eggs, vegetable oil, applesauce, yogurt, sugar, honey, and vanilla. Mix the flour mixture into the egg mixture. Fold in the zucchini, carrots.  Do not over mix.

Scoop into lightly greased muffin pans.

Bake for aprox 18 minutes or until toothpick comes out clean.  This recipe makes 24 muffins.

After cooled, these freeze nicely.

Hallie

Breakfast Burritos

Aug 9, 2012


Let's start with a disgusting story.

I mean gross.

It takes place at McDonald's, where about 66% of gross stories begin.

When I lived in Texas my friend and I would frequent the drive through on weekdays and get breakfast before school and work. I was a vegetarian at the time, so I ordered the breakfast burritos without sausage. And then one weekend we were driving to Houston and had to leave early so we stopped at McDonald's. I ordered the usual and was denied.

It was a weekend, so the usual crew I was familiar with wasn't there, so I spoke very slowly and ordered again.

Denied.

It was explained to me that the filling for the burritos comes premixed and therefore could not be made without sausage.

Umm...but I order it at least once a week, I said.

And then. The worst thing possible came out of Mr McDonald's mouth.

"Oh, they probably just pick it out for you. We can do that, no big deal.". NO BIG DEAL??? That is a very freaking Big Deal. Gross gross double triple gross.

These aren't gross. In fact, they are yummy, convenient, and very easy to make. I most often make freezer burritos with sausage, but I have made them with bacon, soy crumbles, and mushrooms. They are good with added canned green chilies, peppers, or black beans. All variations are good, however, if you use a substitution for the sausage I would recommend adding the green chilies or using pepper jack cheese because it can be a bit bland.

Ingredients - use the amounts of ingredients to your taste and needs. I made a batch of 16, but if you want more or less, adjust. This recipe is very forgiving and can be made and adjusted to your liking.


1 lb Sausage
2 tbsp Canola or vegetable oil
1/2 Onion diced
3/4 bag Frozen hashbrowns (also good with homemade fried potatoes especially if you have left over baked potatoes to use up)
Canola oil
12 Eggs- beaten with a little water and salt and pepper
2 cups Shredded cheese (I generally use cheddar, Mexican blend, or Colby jack...whatever I have)
16 Tortillas (the ones I use are the taco size)
Wax or parchment paper
Freezer bags

Defrost frozen hashbrowns. Squeeze out water and drain very well.

Warm oil in skillet and add onions and potatoes. (If using your own potatoes, cook them on their own for awhile before adding onion to prevent the onion from burning. ) Sauté until potatoes have begun to brown.
At the same time, brown sausage in separate skillet. Drain and add to potato and onion mixture.
Wipe out sausage skillet and add eggs. Scramble. Be careful not to over cook. Unless you like over cooked eggs. In that case, over cook the heck outta them. Add eggs to sausage mixture.
Add 1 cup of the cheese to sausage mixture.


Warm tortillas in microwave. I warm several at a time by wrapping in paper towels and microwaving for about 10 seconds.

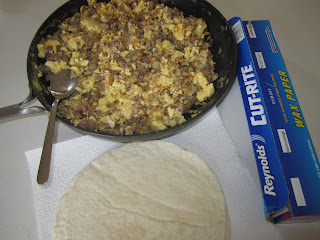
Place tortilla on plate and add filling. Sprinkle additional cheese if desired and roll up tightly burrito style (Bottom folded first, fold in both sides, then roll.) Place seam side down on waxed or parchment paper.


Wrap burrito. I don't tape the paper, because I know my husband, and I know that he will never remember to remove it before he reheats. (Love ya, babe.).

Place wrapped burritos into freezer bags and place in freezer.


Leave burritos in paper for heating. When placed in the microwave right from the freezer, I usually will cook mine for 1 to 1.5 minutes on 50% power, then flip it and cook for another minute on high. My husband takes them to work so they have an opportunity to thaw a bit so he cooks his for 45 seconds and then flips and cooks for 30 seconds all on high.

Bryn

Yogurt Parfaits

Aug 8, 2012


This post brought to you today by McDonalds ... Just hop in your car, buckle the kids up and hit the drive through for an easy breakfast.

Not!

You can make your own at home very easily and save yourself the hassle.

First, the granola.  It is so easy, it is ridiculous. 

It is even called Lazy Granola.

And it makes a ton.

I found the recipe at The Finer Things in Life.  She posted the recipe with permission from the original author, whom the granola is named after (Crystal's Lazy Granola).

Ingredients

1/2 cup honey
1/2 cup brown sugar
1/2 cup oil (I used canola)
1 tsp cinnamon
2 tsp vanilla
7 cups old fashioned oats

Preheat oven to 375 degrees.

Place oats in a large bowl and set aside.

Mix the brown sugar, honey, and oil in a small sauce pan and bring to low boil.

Remove from heat and stir in the cinnamon and the vanilla.

Pour over oats.  Stir until all oats are well coated.

Dump the oats onto a baking pan and spread flat; bake for 10 minutes.  Pull pan out and stir.  Place pan back in oven and turn oven off.   Go to bed and wake up to a lovely smelling house!


I told you it makes a ton.


Add yogurt and strawberries and you have a yummy breakfast!


Hallie

Oatmeal Chocolate Chip Waffle Sticks

Aug 7, 2012

To me, the key to school morning breakfast is quick and easy. 

Everybody is grouchy.  No one is fully awake.  I just need to get food in front of them so that I don't have to listen to any whining or complaining.

To make that happen, I freeze a lot of stuff.  About once a month, I batch bake waffles, pancakes, muffins, french toast sticks, etc and then freeze them all.  That way all I have to do on a busy morning is pop something in the toaster, add fruit and a piece of turkey bacon and boom, easy, nutritious breakfast.

One of the kids favorites - Waffle Sticks.  Don't ask me why they have to be sticks, they just do.  They won't eat them as whole waffles.  There apparently, is novelty in packaging.  And it really doesn't make any difference to me, as long as they eat them. 

Ingredients (yes, there are a lot of them!)


  • 1 cup all-purpose flour
  • 1/2 cup whole wheat flour
  • 1 cup old fashioned oats
  • 1 tablespoon baking powder
  • 1/2 teaspoon cinnamon
  • 1/4 teaspoon salt
  • 2 eggs, slightly beaten
  • 1 1/2 cups milk (may need more, I sorta add as I go to get proper texture)
  • 2 tablespoons butter, melted
  • 2 tablespoons brown sugar
  • 1/2 to 3/4 cup mini chocolate chips

  • In large mixing bowl, stir together flour, oats, baking powder, cinnamon and salt; set aside.


    In small mixing bowl, stir together eggs, milk, butter, and brown sugar.  Add to flour mixture.  Stir.  Add chocolate chips.


    Spoon onto grid of well greased waffle maker.  Follow waffle maker directions - mine take anywhere from 3 to 5 minutes. 


    These get a nice crunch to them.  These aren't just for the kids - the hubs and I love them too.  After I have finished the whole batch and they have cooled, I cut them into individual sticks and put them on a baking pan.


    Place the pan in the freezer for a few hours.  Then put the frozen sticks into a ziplock bag.  To prepare in the mornings, I just pop into the toaster on the lightest cycle.  Usually takes two to three cycles.

    Hallie

    Pumpkin Chocolate Chip Pancakes

    Aug 6, 2012

    "The Princess" won't eat eggs or cheese, which leaves healthy breakfast options pretty limited. Oatmeal, whole wheat toast, whole grain low sugar cereal...it gets very repetitive. She would, of course, eat waffles or pancakes every single day if I let her. While I would love to whip her up pancakes or waffles on demand, that's just not always an option. Store bought boxed versions are certainly easier, but I would prefer not to give them to her. Making homemade pancakes and waffles is so easy and doubling your batch and freezing the leftovers makes for a super easy breakfast. Also, by making them myself I can control the ingredients.


    I generally try different recipes each time I make a batch of pancakes or waffles. This allows for some variety and also allows me to work in healthy additions like bananas, applesauce, etc. I always use whole wheat flour for at least a portion of the flour called for if the recipe I select doesn't already call for it. For this pancake I wanted to use pumpkin, so I searched and found a recipe I thought would work.

    I started with the basic ingredients and made changes that would better suit my family. It would be great if The Princess would eat flaxseed in her pancakes, but I know that if the texture is the slightest bit grainy, she won't eat it. I would rather not add it than throw a whole bunch of pancakes out. She has no idea that it's added to her muffins , and that works fine for us. I also added maple extract and I added more chocolate chips (really, 2 tblsp?!?!?). The following recipe makes about 12-14 4" pancakes. I doubled the following recipe to allow for lots of leftovers.


    1 cup all-purpose flour
    1/2 cup whole wheat flour
    2 tablespoons granulated sugar
    4 tablespoons mini semi-sweet chocolate chips
    1 tablespoon baking powder
    1/8 teaspoon salt
    2 large eggs
    1 1/3 cups milk
    1/2 cup canned 100% pure pumpkin
    1 teaspoon vanilla extract
    1/2 teaspoon maple extract

    Thoroughly mix flours, sugar, baking powder, salt, and chocolate chips (Walmart of course didn't have the mini chips, so I used regular and chopped them).


    In a separate bowl beat eggs and then add milk, pumpkin, and extracts. Whisk until smooth.
    Pour liquid ingredients over dry and mix until just combined. There will be lumps.

    It's ok.

    Move on.

    Lightly oil skillet and place over medium high. Pour 1/4 cup batter onto hot skillet to form each pancake. Once bubbles begin to appear and the bottom is golden brown flip and continue to cook for an additional 3 minutes.


    I was a little alarmed when I turned one of the pancakes over to find a huge burned spot...then I remembered the chocolate chips and all was right with the world again.

    To freeze leftovers I allow the pancakes to cool completely then I place in a freezer bag with wax or parchment paper between the layers. To reheat, I wrap in paper towel before placing in microwave to absorb any moisture. I heat for 30 seconds and then 15 second increments after that. Enjoy.

    Bryn

    Easy Ice Cream

    Aug 1, 2012


    I love my ice cream maker and we use it fairly often. Before we had it though, we would make a super simple 3 ingredients ice cream that required only a mixer and a loaf pan.

    Can't get much easier than that.

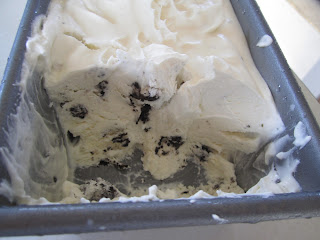
    The end result is fluffy and smooth, more like soft serve Dairy Queen and less like Baskin Robbins. It is very sweet though, so a dark chocolate swirl, an unsweetened berry puree, or lemon zest would be great in it.

    We don't mind sweet though ...

    so we added cookies.

    Duh.

    Ingredients


    2 cups heavy cream
    1 14 oz can sweetened condensed milk
    1 1/2 tsp pure vanilla extract
    Whatever sauce or mix in you would like to add.


    Beat ingredients until stiff peaks form. 3-5 minutes generally.


    Fold in your mix ins. (if using zest, I would combine it with the ingredients to start with).

    Pour into loaf pan or freezable container and freeze until firm.


    Bryn
    Blog contents © Try One ... 2012. Blogger Theme by Nymphont.